Baking with yeast opens the door to a world of culinary creation, from crusty bread loaves to sweet, fluffy pastries. This course is designed to guide beginners through the foundational skills and knowledge required to master yeast baking. Starting with understanding the different types of yeast and how to activate them, to the intricacies of kneading and proofing dough, and finally exploring the versatility of yeast in creating a variety of baked goods, this step-by-step guide promises to transform baking novices into confident home bakers. Embrace the journey of discovery in the art of baking with yeast, where patience and creativity lead to delicious rewards.
Lesson 1

Understanding Yeast: The First Step in Baking
Embarking on a baking journey begins with a single, crucial ingredient: yeast. Understanding yeast is paramount for beginners, as it serves as the backbone of many baked goods. This guide aims to demystify yeast, ensuring your baking adventures start on the right foot.
Types of Yeast: Making the Right Choice
There are primarily three types of yeast used in baking: active dry, instant, and fresh yeast. Each type has its place in the kitchen, but knowing which to use when can elevate your baking game.
- Active Dry Yeast: Requires activation in warm water and is ideal for bread recipes that allow for longer rising times.
- Instant Yeast: Can be mixed directly with dry ingredients and is perfect for recipes with shorter rise times.
- Fresh Yeast: Often used by professional bakers, it offers a rich aroma but has a short shelf life.
Activating Yeast: The First Critical Step
Activating yeast properly is a gateway to successful baking. Start by dissolving the yeast in warm water (ideally around 110°F) with a pinch of sugar. If the mixture bubbles and foams, your yeast is alive and ready. This simple test not only proves viability but also introduces beginners to the magical process of yeast activation.
Choosing the Right Flour and Kneading Techniques
Flour plays a significant role in the outcome of your baked goods. For your first dough, all-purpose or bread flour are excellent choices. Measuring your flour accurately (preferably by weight) ensures consistency. When it comes to kneading, doing so on a lightly floured surface until the dough is smooth and elastic builds the foundation for light, airy bread. Remember, patience and persistence are key!
Proofing Your Dough: Understanding the First Fermentation
The first fermentation, or proofing, is a crucial step in the baking process. Place your kneaded dough in a warm, draft-free spot, allowing it to double in size. This step not only develops the dough’s structure and flavor but also prepares it for shaping and further fermentation.
Conclusion
Understanding yeast is the cornerstone of successful baking. By choosing the right type of yeast, activating it correctly, selecting the appropriate flour, meticulously kneading your dough, and patiently proofing it, you’re setting yourself up for baking success. Remember, every baker starts with a single step, and mastering the use of yeast opens up a world of delicious possibilities.
Lesson 2

Shaping, Proofing, and Baking: Mastery Over Yeast Breads
Baking with yeast is not just a cooking technique; it’s an art that combines science, patience, and creativity. After mastering the basics of working with yeast, it’s time to shape, proof, and finally bake your bread to perfection. This guide will walk you through these critical steps, ensuring your yeast bread is nothing short of spectacular.
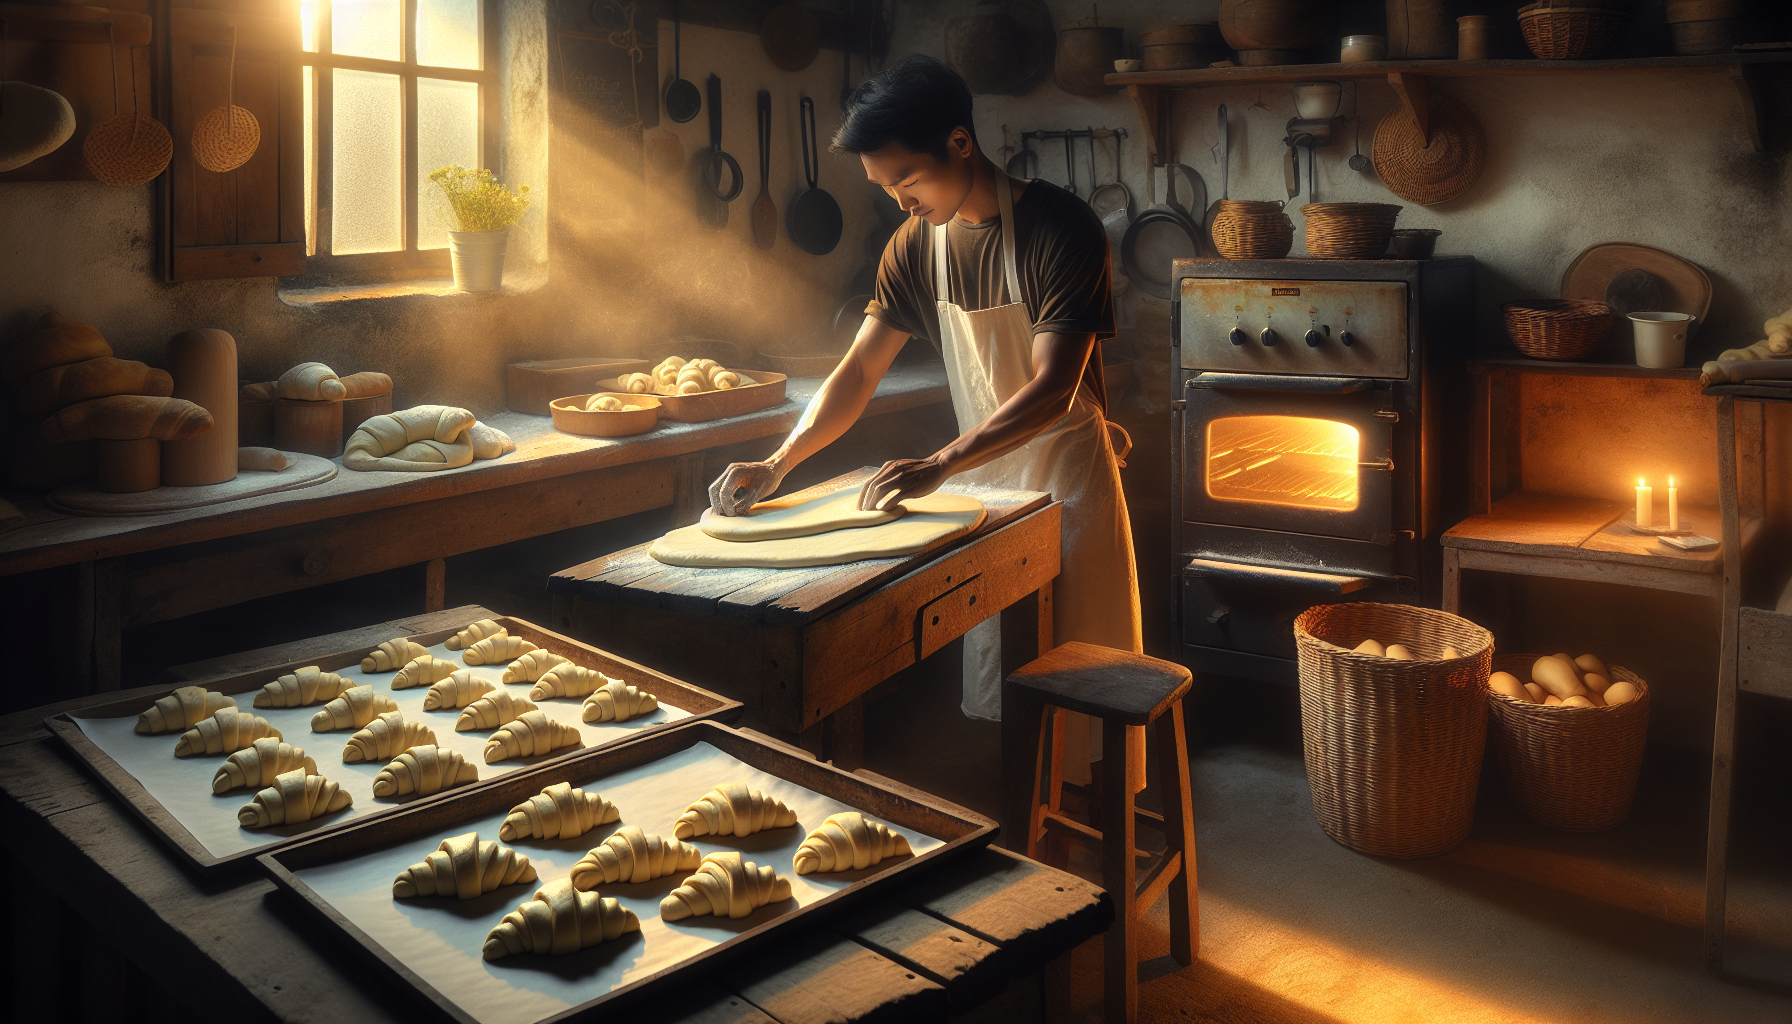
Shaping Your Dough with Confidence
Shaping is more than just an aesthetic step; it’s about preparing your dough for successful baking. Whether you’re aiming for a rustic boule or a classic loaf, the key is to handle the dough gently yet firmly. Start by flattening your dough into a rectangle, then fold and roll tightly for loaves or shape into rounds for boules, ensuring the surface is taut. This process helps in creating a bread structure that will beautifully rise during baking.
The Art of Second Fermentation (Proofing)
Proofing, or the second fermentation, is crucial for developing flavor and volume. This step allows the shaped dough to rise and expand, filling with air pockets that will become the hallmark of great bread. Place your shaped dough in a warm, humid environment free from drafts and let it rise until it has almost doubled in size. The poke test can help determine if your bread is ready for the oven: a gentle poke should leave an indentation that slowly springs back.
Baking Your Bread to Golden Perfection
Baking is the climax of the bread-making process. Preheat your oven to the correct temperature before baking for a strong oven spring. Introducing Steam during the first few minutes of baking can help achieve a crisp crust. Bake until your bread is golden brown and sounds hollow when tapped on the bottom. Letting your bread cool on a wire rack will help the crust stay crispy, and resist the temptation to cut into it until it’s cooled to allow the interior structure to set.
Unveiling the Magic of Yeast Baking
Mastering the steps of shaping, proofing, and baking is pivotal in yeast baking. Each step builds upon the last, contributing to the final taste, texture, and appearance of your bread. With practice, intuition, and creativity, baking with yeast transforms from a daunting task to an enjoyable and rewarding experience, yielding delicious results that are worth the effort. Let the aroma of freshly baked bread fill your kitchen and savor the satisfaction of having crafted something truly special with your own hands.
Lesson 3

Expanding Your Baking Horizons: Yeast-Leavened Specialties
After conquering the fundamentals of baking bread with yeast, it’s time to explore the versatile world of yeast-leavened specialties. Moving beyond basic bread, this lesson will introduce you to the delightful variety of goods you can create with the magic of yeast. From fluffy dinner rolls to sweet, indulgent cinnamon rolls, the possibilities are endless and promise to add excitement to your baking adventures.
Diving into the World of Sweet and Savory Treats
Yeast doesn’t just mean bread; it’s the key to a whole new realm of baking. Imagine pulling apart a warm, buttery dinner roll at the table or unwrapping the spirals of a cinnamon roll to find a gooey, sweet center. These are the experiences we’ll embark on, showing how a single ingredient like yeast can provide such a wide array of flavors and textures.
- Dinner Rolls: Soft, fluffy, and perfect for any meal.
- Pizza Dough: Crisp on the outside, tender on the inside.
- Cinnamon Rolls: Sweet, sticky, and utterly decadent.
Customization: The Key to Creative Baking
The real joy of baking with yeast comes from the ability to customize your creations. Incorporating different flours, such as whole wheat for a nuttier flavor or rye for a denser texture, can transform your goods. Adding fillings, whether sweet like cinnamon sugar or savory like cheese and herbs, introduces layers of flavor that make each bite a discovery.
Troubleshooting Common Yeast Baking Challenges
Encountering challenges in yeast baking is a part of the learning process. This lesson addresses common issues such as dough that won’t rise, bread that’s too dense, or filling that leaks out. By understanding these common pitfalls and knowing how to avoid them, you’ll become more confident and skilled in your baking technique.
Conclusion: Yeast Baking as a Journey of Discovery
Exploring the diverse world of yeast-leavened goods not only broadens your baking repertoire but also deepens your appreciation for the art of baking. Each recipe is a new opportunity to experiment, learn, and, most importantly, enjoy the fruits of your labor. With yeast as your ally, the kitchen becomes a place of endless possibilities, where each baking session is an adventure waiting to unfold.
Baking with yeast is a captivating journey that combines science, creativity, and patience to produce an array of delicious baked goods. Throughout this course, you’ve learned the essentials of yeast types, dough preparation, fermentation, and the art of baking itself. Moreover, you’ve discovered the joy in customizing your creations and troubleshooting common baking issues, further enhancing your skills as a home baker. As you continue to explore the endless possibilities that yeast baking offers, remember that practice and experimentation are key to mastery. To test your newfound knowledge and ensure you’re ready to embark on your next baking adventure confidently, take the 10 question quiz below. Happy baking!
Test Your Knowledge With this short Quiz
Click here to copy your score to share on facebook!